
Teach your little chemist all about the joy of cooking and science with chocolate covered strawberry science! This was a great activity for simple, hands-on learning.
My children learned how to make a hypothesis, what a phase change looks like, and what a melting point is. We also worked on gross/fine motor skill development and practiced following directions.

Here’s what you need to get started:
- Strawberries – approximately 1 pound (washed and dried) with the leaves
- Water (enough to boil in a double broiler)
- 16 ounces of melting chocolate (and if you want to add a chocolate drizzle, add an additional 4 ounces of melting chocolate),
- 1 double broiler (or you can use a metal or glass mixing bowl over a pot of boiling water),
- Mixing spoons to mix the chocolate as it melts
- Wax paper lined baking sheets (to place the strawberries on after they are dipped in chocolate)
- Microwave safe bowl to melt the chocolate for the drizzle
- Microwave
Here’s what you do:
Step 1 – Wash and dry the strawberries (at least four hours in advance):
Wash the strawberries as desired with water. Be sure to let the strawberries completely dry before coating them with chocolate. We waited four hours.
Step 2 – Melting the chocolate:
WARNING: The chocolate will be HOT when it is melting. Assess your child’s age and abilities before allowing them to melt the chocolate or dip the strawberries in the chocolate.
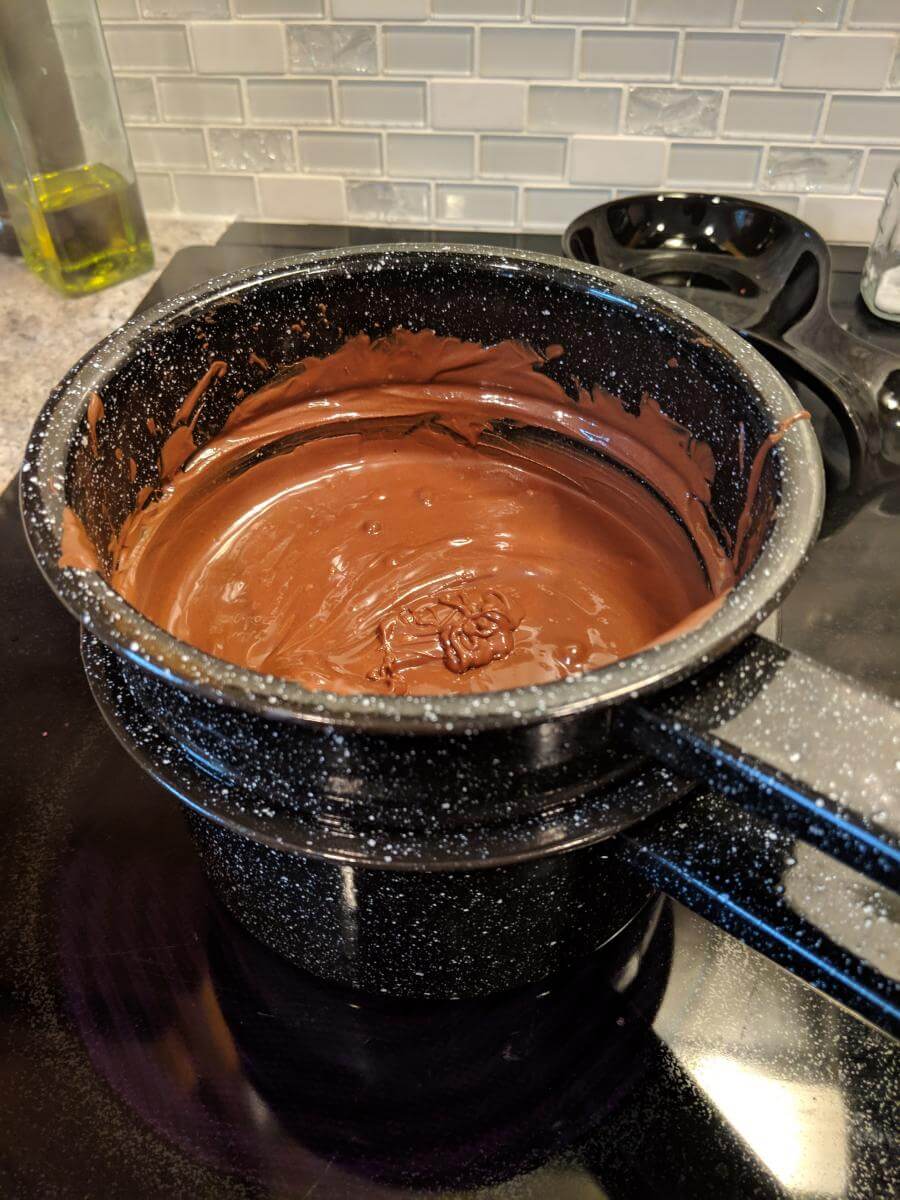
Before melting the chocolate, we examined it with all of our senses – my children loved tasting it the most! I stressed that the chocolate is a ‘solid’ and it is cool at room temperature.
The kids then poured the chocolate into the double broiler and we hypothesized about what might happen to the chocolate as it heated. My 4 year old confidently said, “Mommy, it’s going to melt!”
As we stirred the chocolate chips in the double broiler, the chocolate did indeed begin to melt. I explained that the chocolate had started to reach its ‘melting point.’ It was melting to a liquid and that this change was called a ‘phase change.’
Step 3 – Dipping the strawberries into the chocolate:
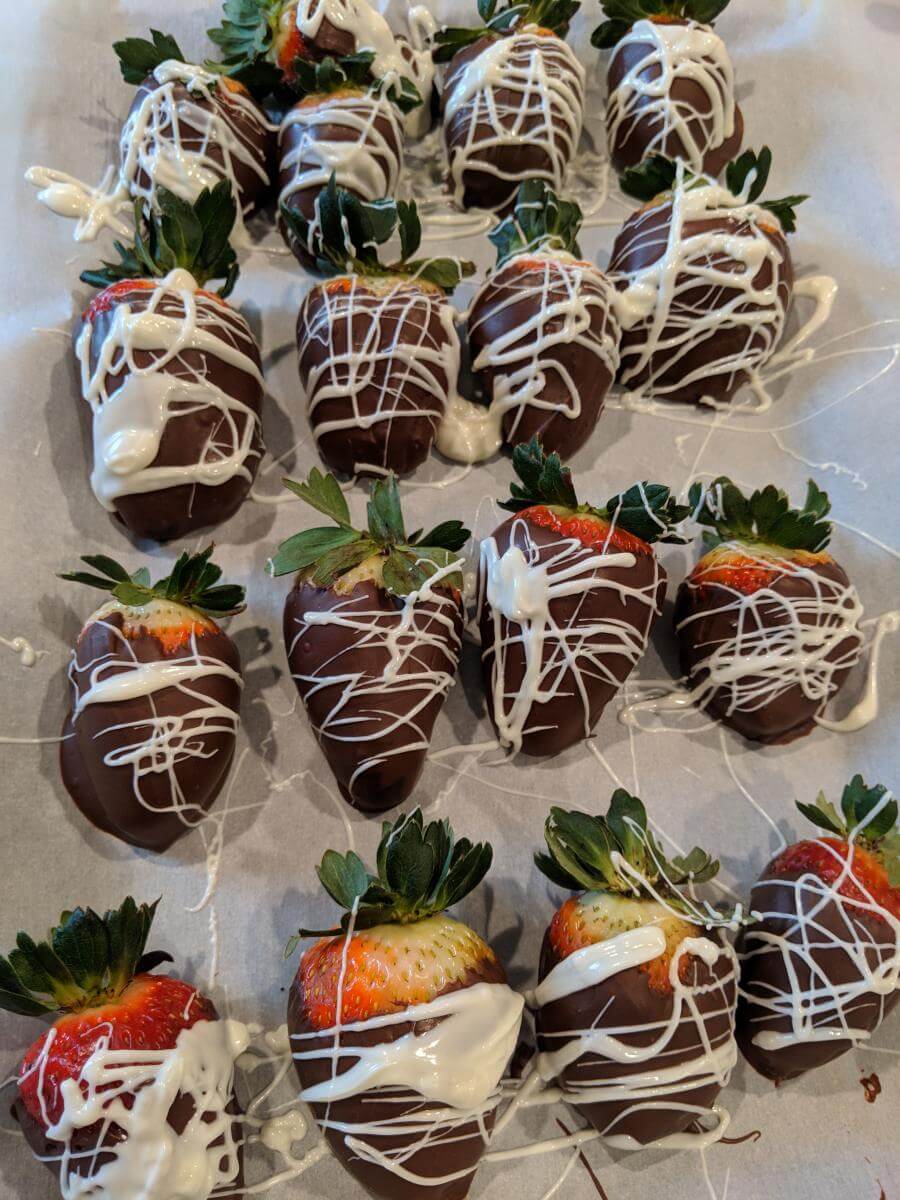
As we dipped the strawberries into the pot of hot liquid and twirled it around the strawberries, my children helped me lay them in straight lines on the wax paper. We hypothesized about what might happen to the chocolate as it cools. We all agreed and watched as the chocolate encountered another ‘phase change’ and turned back into a ‘solid.’

Step 4: Chocolate drizzle:
For this step, I melted the chocolate in a microwave safe bowl in the microwave. (Tip: If you do this, do it gradually and stir it between heating cycles to prevent the chocolate from burning.) My kids experimented with the technique on this, which was also a great activity for them to practice fine motor skills! We found that dipping a spoon in the chocolate and then doing a quick drizzle over top was the best approach to make fine lines.
Extra challenges for curious kids:
For extra curious kids, you can introduce some additional challenges to this activity such as:
- Using a scale to measure out the ingredients and work on conversions,
- Use a cooking thermometer to measure the melting temperature of the chocolate, or
- Experiment melting different kinds of chocolate and decide what temperature each melts at and why.
With this activity, your little scientist will be sure to love their chocolate covered strawberry creation and learn some cool science
Looking for more science projects in the kitchen? Check out my other food science posts here!
Have a wonderful day and don’t forget to stay curious!
Also, check out my short video on Instagram about the blog post!
Kristen


Leave a comment